TIP: Playwright Trace Viewer - Copy as Playwright API Request

With the latest 1.50 Playwright release, there was a really nice feature that was released that will help speed up test automation api requests. The feature is found on the Playwright Trace Viewer which is found in Playwright UI mode or the HTML test report.
From Playwright Test Report
To be able to view your traces after a test run within the playwright.config.ts file you will need set 2 values.
First - reporter: "html" in the below example I have multiple reporters active which is why I use the array syntax but if you just need 1 reporter you can pass in "html"
Second - in the use section you want to set trace: "on". This will ensure that any tests that are run the trace file is saved for inspection. Feel free to adjust this when you are ready to commit your changes to your repository, as it's likely you don't need the trace on all the time. I tend to use the value "retain-on-failure".
// playwright.config.ts

import { defineConfig } from "@playwright/test";

export default defineConfig<TestOptions>({
  timeout: 30_000,
  testDir: "./tests",
  fullyParallel: true,
  forbidOnly: !!process.env.CI,
  retries: process.env.CI ? 2 : 2,
  workers: process.env.CI ? 1 : undefined,
  reporter:[["list"], ["html"], ["@currents/playwright"]]

  use: {
    testIdAttribute: "data-test",
    baseURL: process.env.UI_URL,
    trace: "on",
    screenshot: "on",
    video: "on",
  },
});
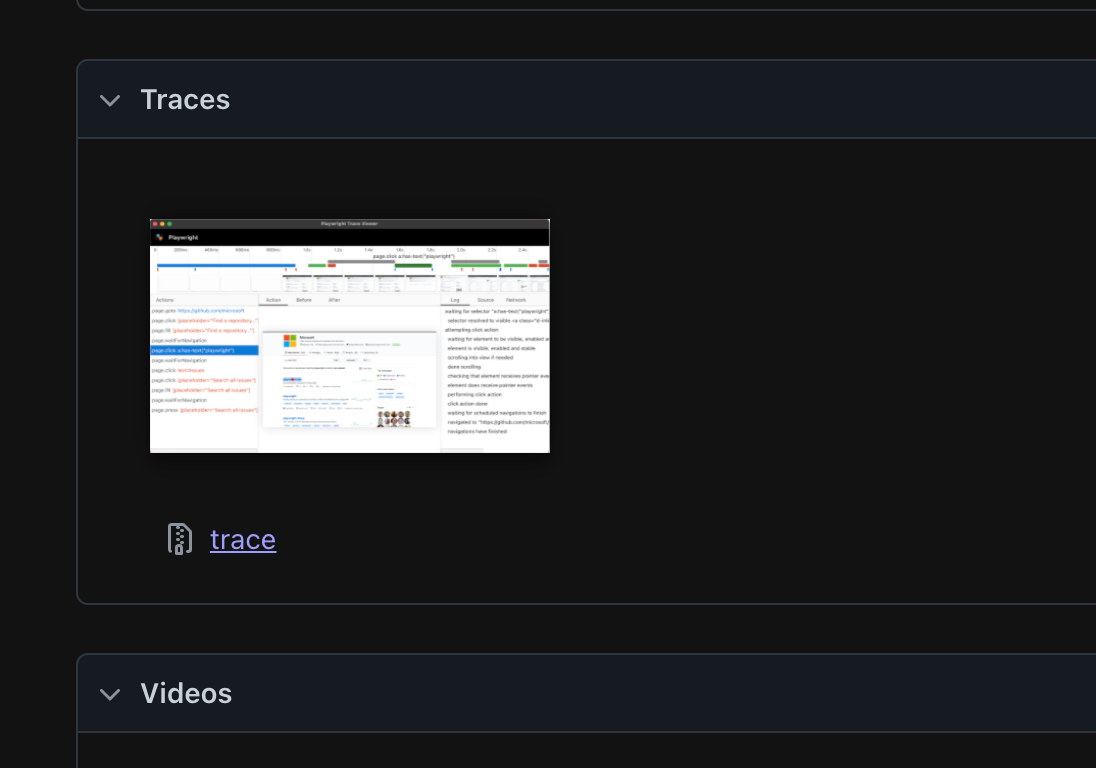
With the configuration you can run your playwright tests npx playwright test and in the html report that either pops up after your test run if there is a failure or you can run manually using the command npx playwright show-report, you'll want to click into a specific test. Scroll down to the Traces section and click on the thumbnail image.
Once clicked you can find the test step, click the network tab, and find the http request you want to copy. In my below example I found the POST request to the users/login api endpoint and on the Request tab I scrolled down and see the "Copy as Playwright" button.
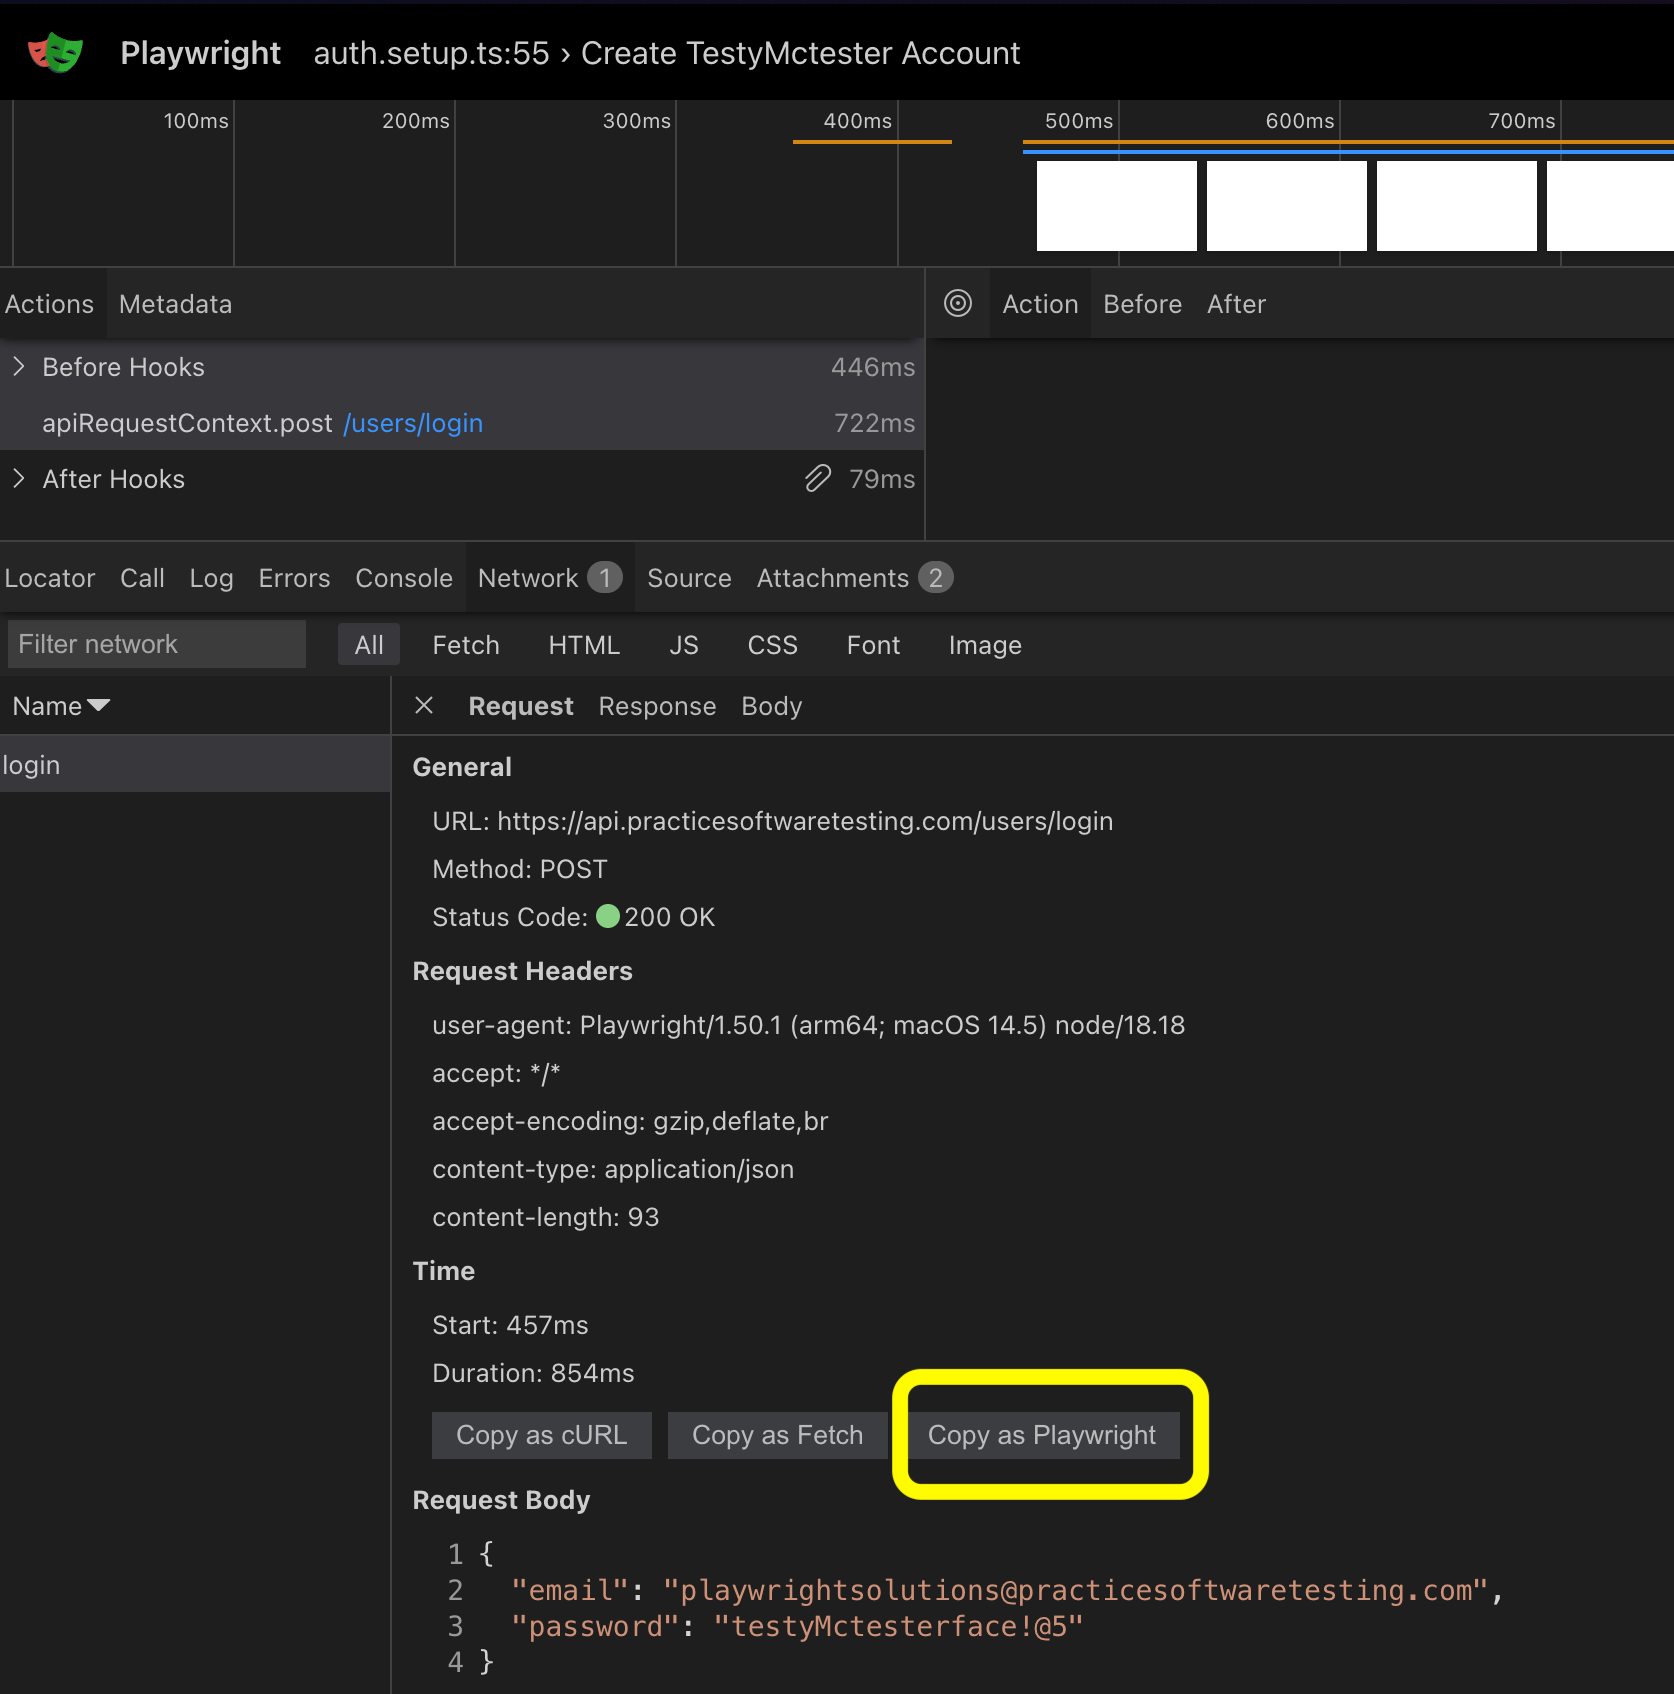
Clicking the button copied the below code into my clipboard.
// from clipboard
await page.request.post('https://api.practicesoftwaretesting.com/users/login', {
  data: `{
  "email": "[email protected]",
  "password": "testyMctesterface!@5"
}`,
  headers: {
    'user-agent': 'Playwright/1.50.1 (arm64; macOS 14.5) node/18.18',
    accept: '*/*',
    'accept-encoding': 'gzip,deflate,br',
    'content-type': 'application/json',
    'content-length': '93'
  }
});
WHAT!!! That was crazy easy! the Copy as cURL and Copy as Fetch are also easy shortcuts that can be used, but having a button to copy the code to be used in a Playwright test is great! Keep reading to the Why This is Incredible sections below for more thoughts on why this is great.
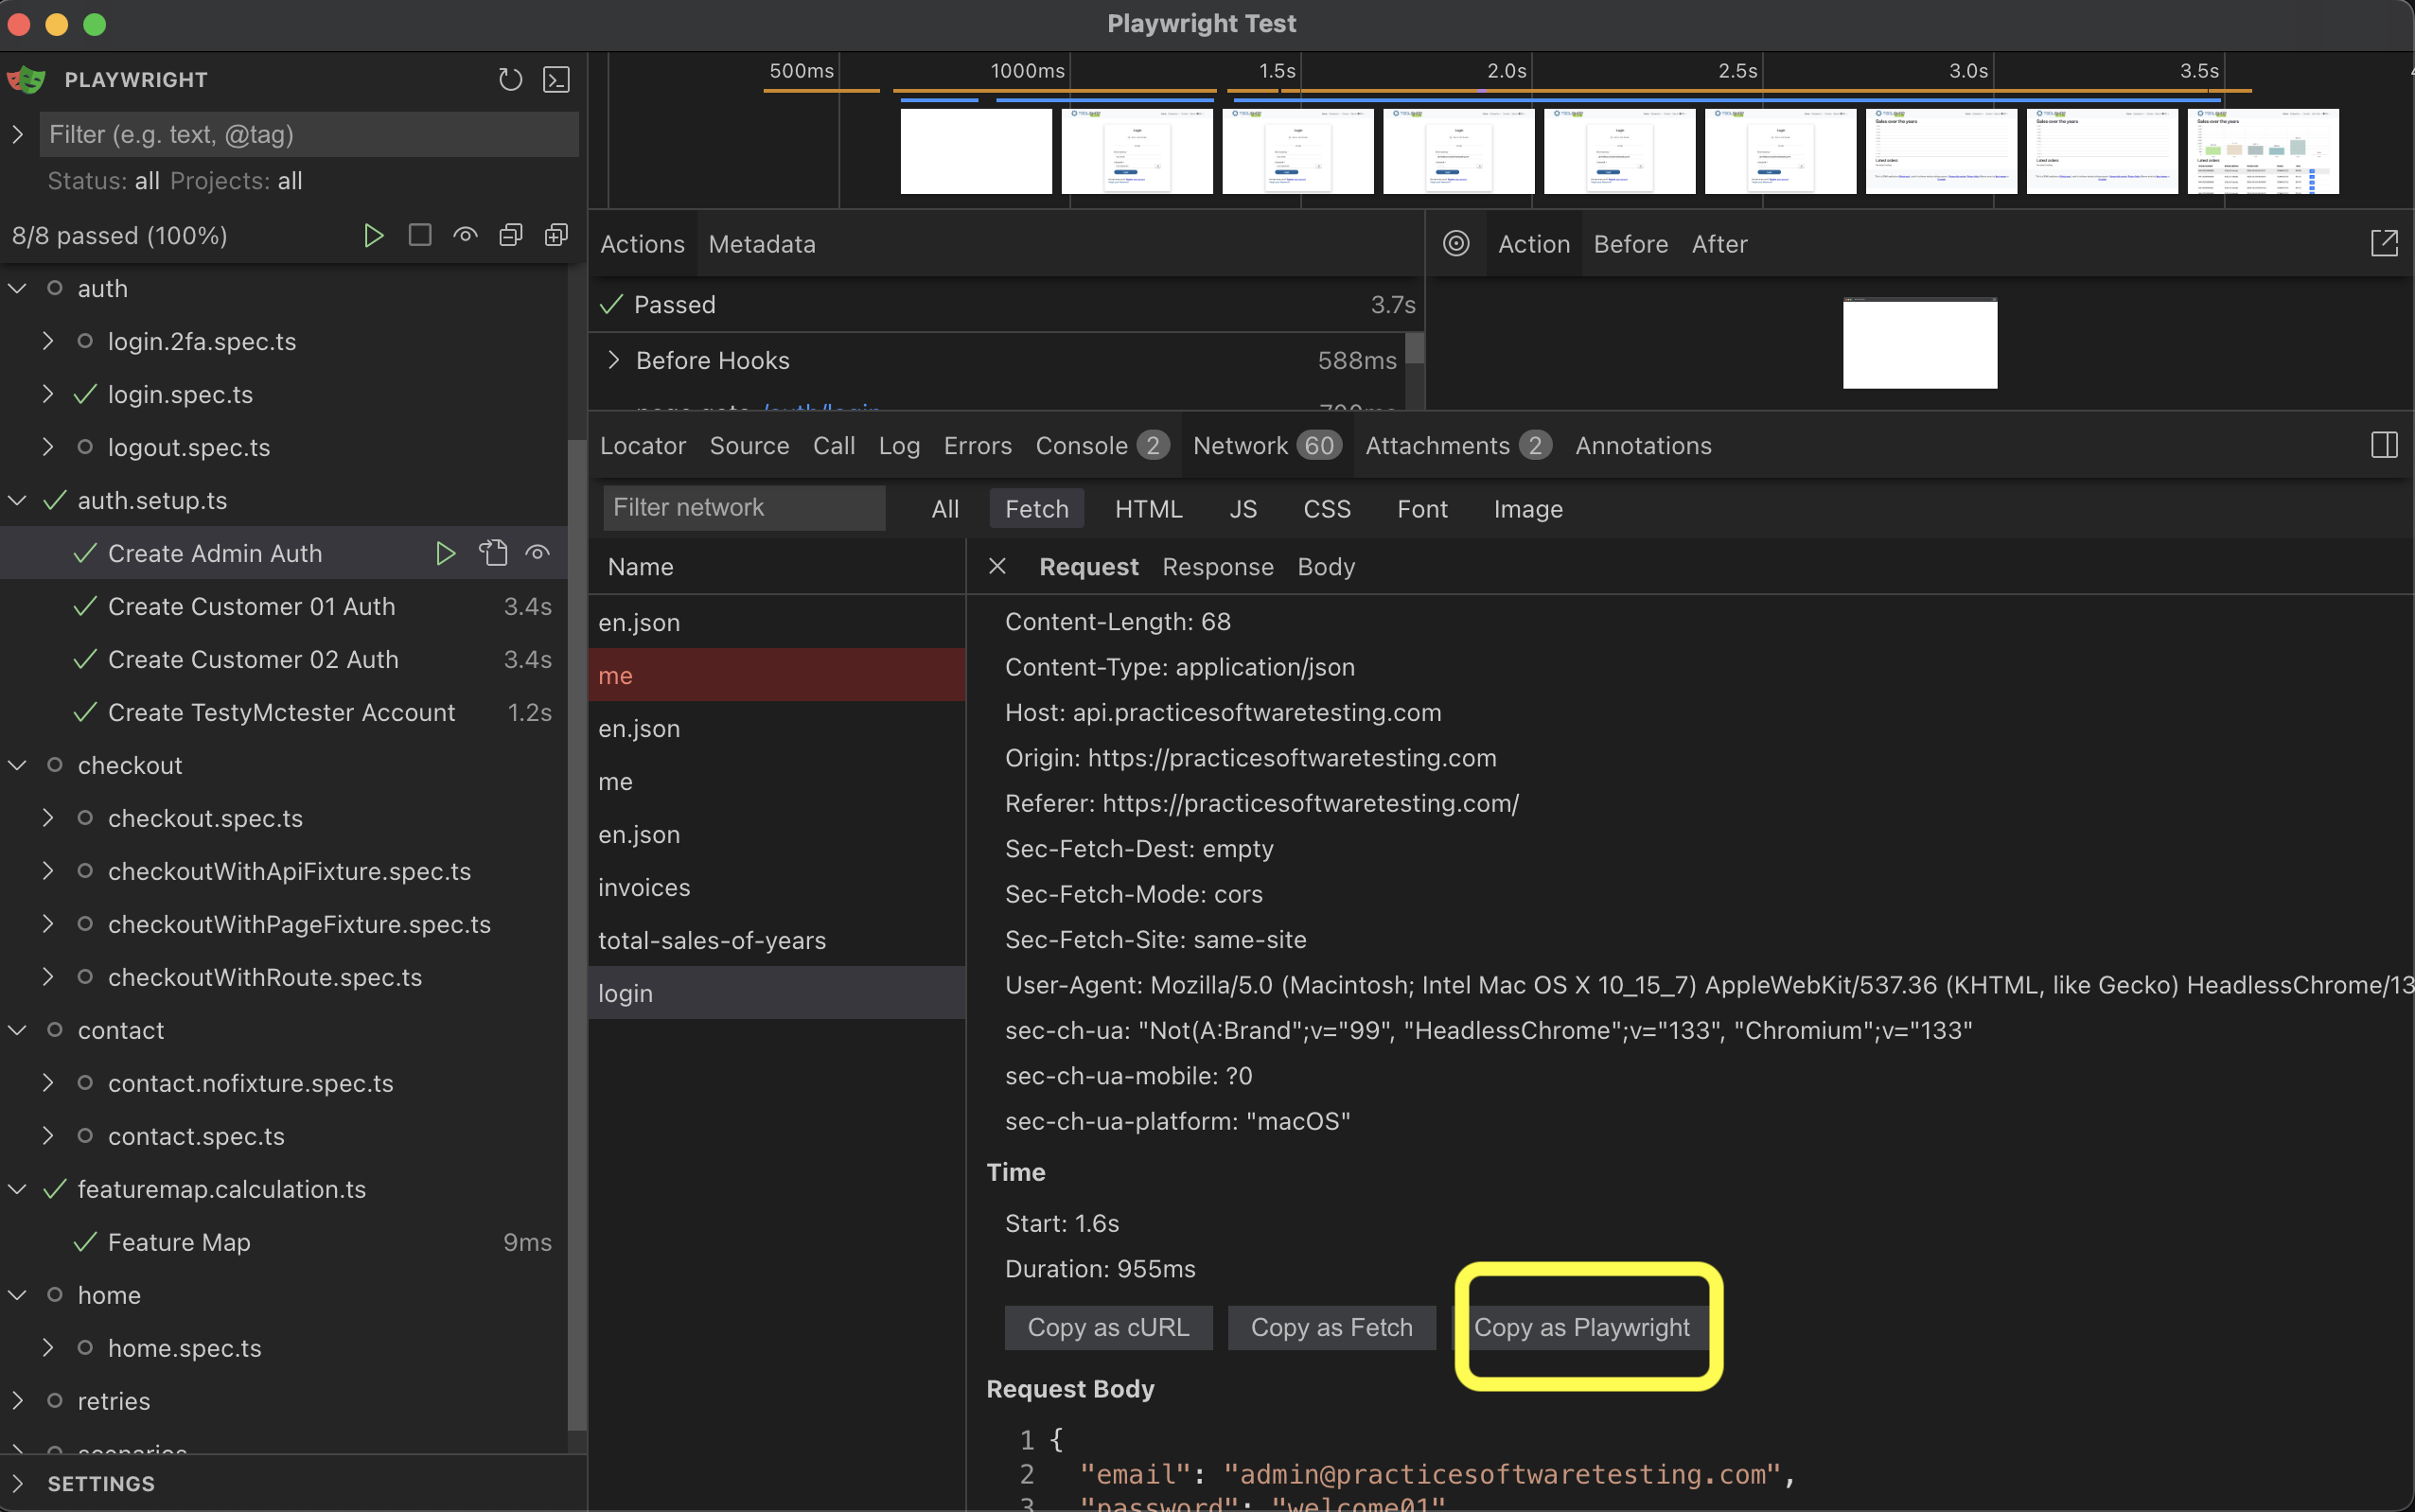
From Playwright UI mode
To enter ui mode you can run the command npx playwright test --ui. This will pull up a UI mode with tests on the left and the same trace viewer on the right, that has the same network tab and Copy as Playwright button once you have a request selected.
Why This is Incredible?
One of my beliefs about automation is one of the hardest parts is creating test data. This functionality will allow you to quickly inspect HTTP requests that are made through the UI and generate code to re-create those request with Playwright.
This is a major shortcut, I will no longer have to closely inspect and copy and paste headers, parameters, or a request body, I just have to make a valid api call through a test (typically using the UI) and then view the trace.
Using this to create test data
For a live example I'll use this repo, which includes a suite of tests and the latest version (1.50) of Playwright configured.
 playwrightsolutions
With our existing tests, I want to stop relying on static data for my test assertions but rather want to create test data as a part of my test setup. Ideally I want to do this from the API rather than from the UI. In this repository, I already have a setup project which will create authentication for each type of user (you can read more about that here - https://playwrightsolutions.com/handling-multiple-login-states-between-different-tests-in-playwright/)
I'll focus on adding a brand on the site under test. Now I just need to create a UI test that will add a brand through the brand page.
import { test, expect } from "@playwright/test";

test.describe("Admin brands specs", () => {
  test.use({ storageState: ".auth/admin.json" });
  test("create a new brand", async ({ page }) => {
    await page.goto("/admin/brands/add");
    await page.getByTestId("name").fill("Playwright Brand");
    await page.getByTestId("slug").fill("playwright-slug");
    await page.getByTestId("brand-submit").click();
    await expect(page.getByText("Brand saved")).toBeVisible();
  });
});
When running this test I can now view the test report/trace file and copy the code
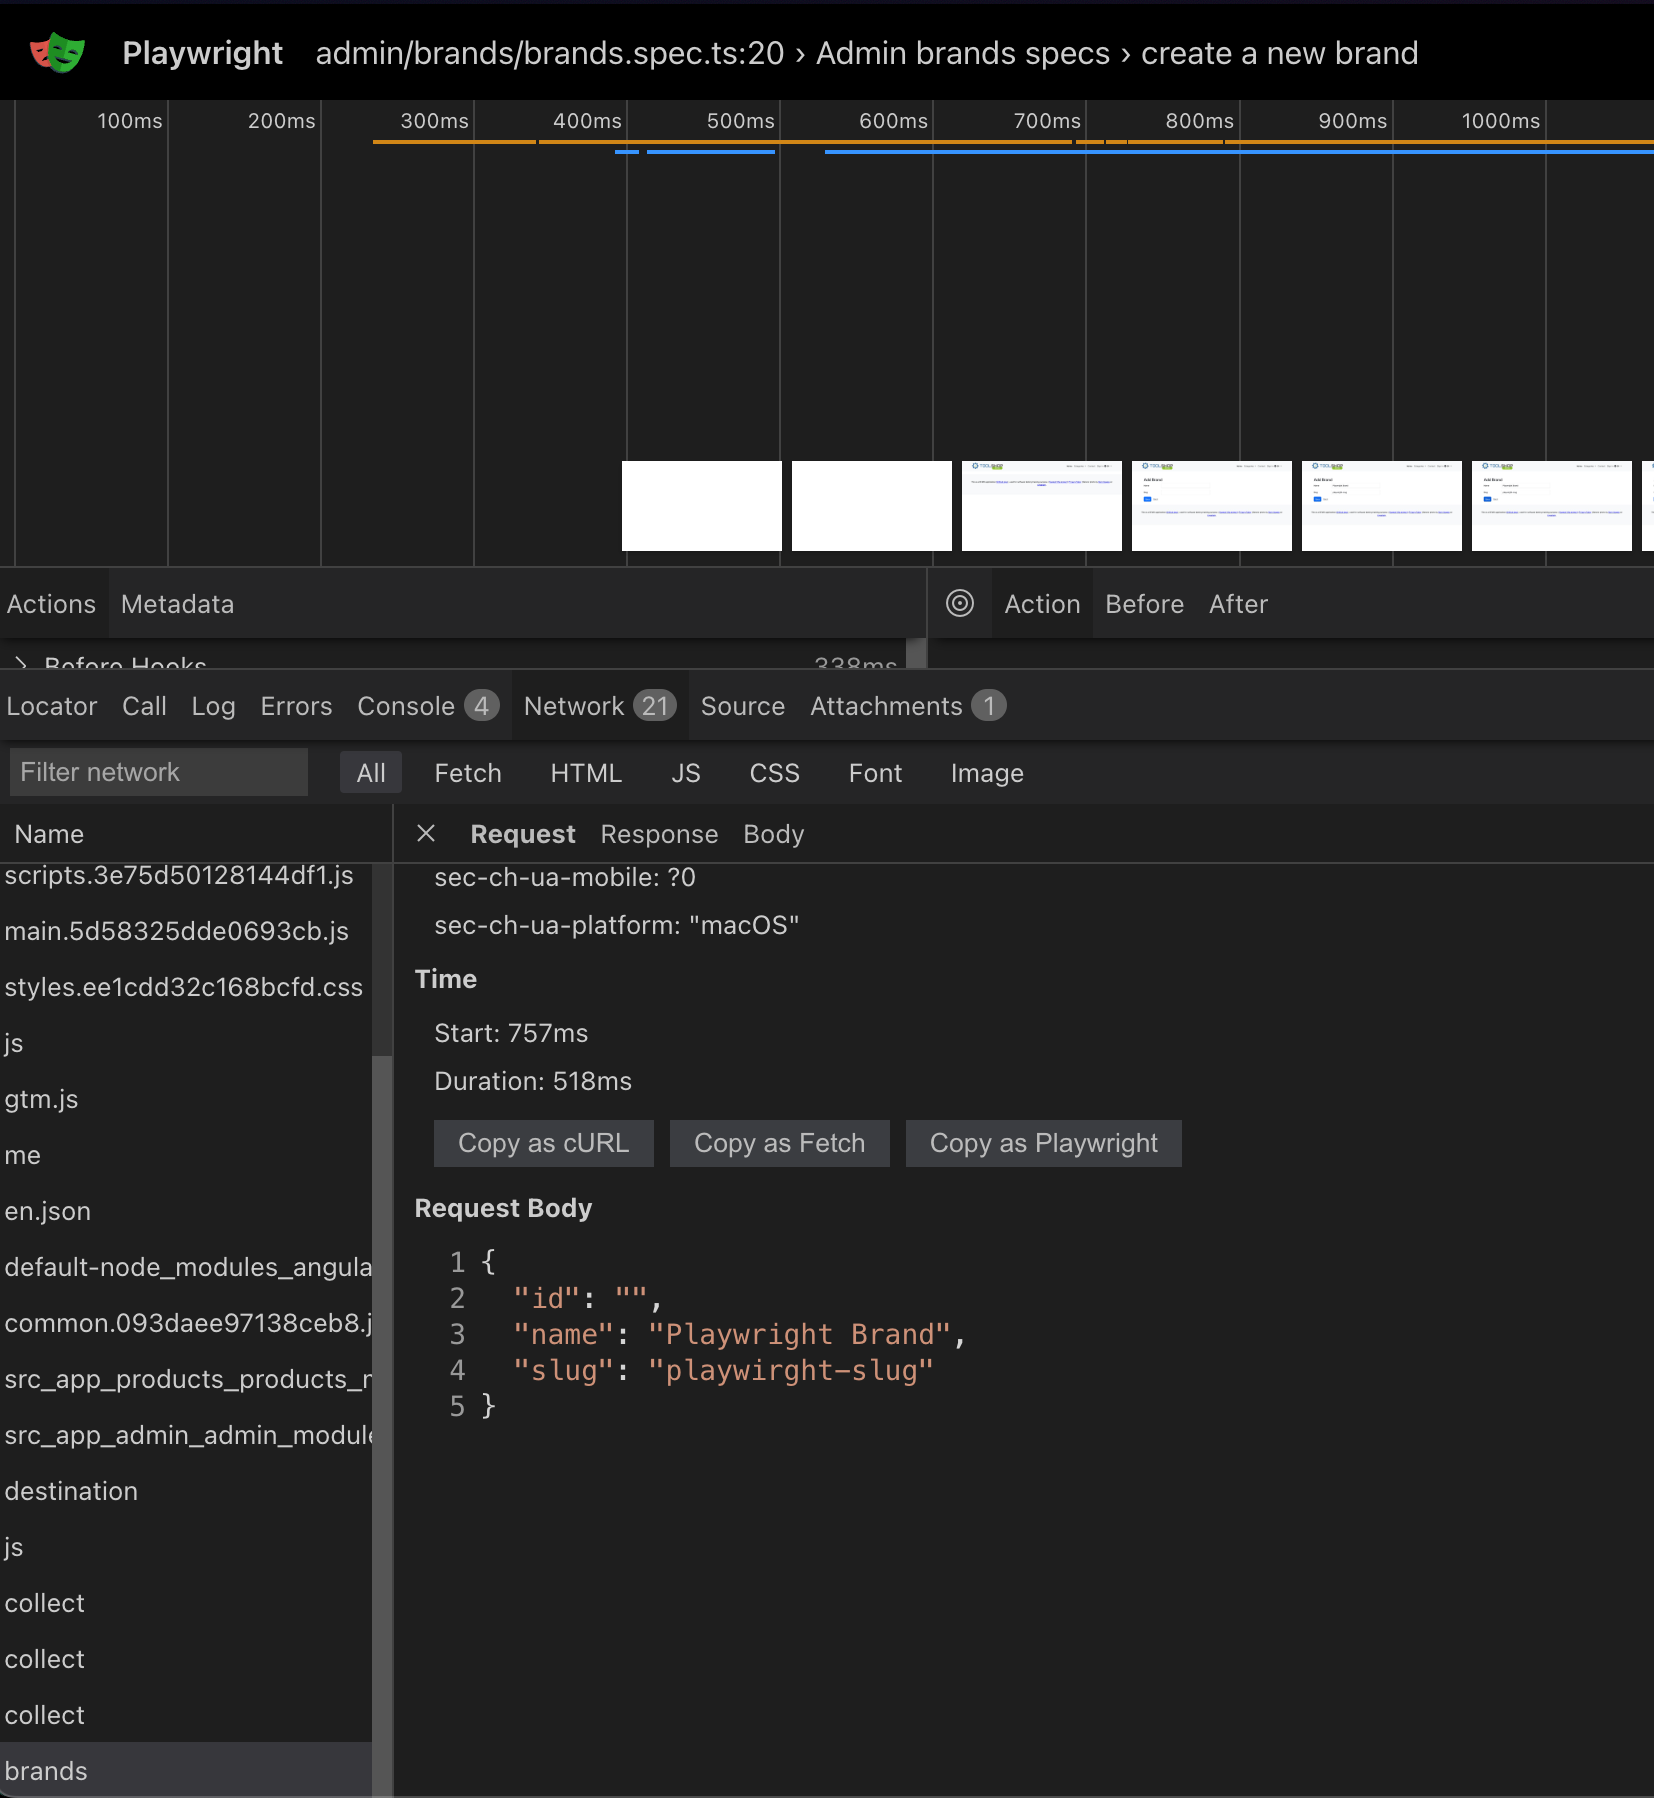
The code below is the entire request pasted. You'll notice that this has a lot more information because the request was made from the browser and there are lots of headers that we actually don't need for data creation process.
await page.request.post('https://api.practicesoftwaretesting.com/brands', {
  data: `{
  "id": "",
  "name": "Playwright Brand",
  "slug": "playwirght-slug"
}`,
  headers: {
    Accept: 'application/json, text/plain, */*',
    'Accept-Encoding': 'gzip, deflate, br, zstd',
    'Accept-Language': 'en-US',
    Authorization: 'Bearer eyJ0eXAiOiJKV1QiLCJhbGciOiJIUzI1NiJ9.eyJpc3MiOiJodHRwczovL2FwaS5wcmFjdGljZXNvZnR3YXJldGVzdGluZy5jb20vdXNlcnMvbG9naW4iLCJpYXQiOjE3Mzg3Mzc4NjIsImV4cCI6MTczODczODE2MiwibmJmIjoxNzM4NzM3ODYyLCJqdGkiOiJrUFNvck14U3pQT29qZ2hCIiwic3ViIjoiMDFKS0FCM0hFVkVUQTJGME5BSjQyR1A3M1kiLCJwcnYiOiIyM2JkNWM4OTQ5ZjYwMGFkYjM5ZTcwMWM0MDA4NzJkYjdhNTk3NmY3Iiwicm9sZSI6ImFkbWluIn0.bjjPGNFtFIzW8VosJg1n7q3_G06HOSKIqcITfw988U4',
    Connection: 'keep-alive',
    'Content-Length': '60',
    'Content-Type': 'application/json',
    Host: 'api.practicesoftwaretesting.com',
    Origin: 'https://practicesoftwaretesting.com',
    Referer: 'https://practicesoftwaretesting.com/',
    'Sec-Fetch-Dest': 'empty',
    'Sec-Fetch-Mode': 'cors',
    'Sec-Fetch-Site': 'same-site',
    'User-Agent': 'Mozilla/5.0 (Macintosh; Intel Mac OS X 10_15_7) AppleWebKit/537.36 (KHTML, like Gecko) Chrome/133.0.0.0 Safari/537.36',
    'sec-ch-ua': '"Chromium";v="133", "Not(A:Brand";v="99"',
    'sec-ch-ua-mobile': '?0',
    'sec-ch-ua-platform': '"macOS"'
  }
});
I'll take the above and modify it to only the essentials. I'll also add "import" statements because I want this to be called from a file outside of a test.
Final Output
Below is that example, you'll notice I had to import extra functions to get this to work as I needed a valid Bearer Token. I generated this and cleaned up the request/response. I decided to modify to use the request method rather than the page method because we aren't working inside a browser for this. I also used interpolation on the brandName and slugName. Because the Trace Viewer copy functionality surrounds the data: with the back ticks ` `.
// lib/datafactory/createBrand.ts

import { expect, request } from "@playwright/test";
import { getLoginToken } from "./login";

export async function createBrand(brandName: string, slugName: string) {
  let apiURL = process.env.API_URL;
  let email = process.env.ADMIN_USERNAME;
  let password = process.env.ADMIN_PASSWORD;

  const token = await getLoginToken(email, password);

  const createRequestContext = await request.newContext();
  const response = await createRequestContext.post(apiURL + "/brands", {
    data: `{
    "id": "",
    "name": "${brandName}",
    "slug": "${slugName}"
  }`,
    headers: {
      Authorization: "Bearer " + token,
      "Content-Type": "application/json",
    },
  });
  expect(response.status()).toBe(201);
}
The final test is below. You can see that we make a call to createBrand() which uses the newly copied Playwright request.
// tests/admin/brands/brand.spec.ts

import { test, expect } from "@playwright/test";
import { createBrand } from "@datafactory/createBrand";
import { faker } from "@faker-js/faker";


test.describe("Admin brands specs", () => {
  test.use({ storageState: ".auth/admin.json" });
  test("validate new brand is rendered in the list", async ({
    page,
    context,
  }) => {
    await page.goto("/admin/brands");

    const name = faker.person.firstName();
    const slug = faker.animal.type();

    await createBrand(name, slug);
    await page.goto("/admin/brands");
    await expect(page.getByText(name)).toBeVisible();
  });
});
This Copy as Playwright button will save you a lot of typing in your future test automation development. Building out tests with a data factory this way allows me to bypass the UI to create test data during my test runs, which should in turn speed up my tests, and I now have a quick way to create future test data.
Thanks for reading! If you found this helpful, reach out and let me know on LinkedIn or consider buying me a cup of coffee. If you want more content delivered to you in your inbox subscribe below, and be sure to leave a ❤️ to show some love.