The Definitive Guide to API Test Automation With Playwright: Part 11 - Adding Multi Environment Support

In part 11 of this series I will cover how you can add multi environment support to your Playwright project. There are multiple ways to handle this depending on how you have built your project. I'll cover the way I handled it which includes having different .env files per environment. As an added bonus I'll also cover how I added an AI code review bot to my repository.
If you're just joining us now go check out the introduction post which links to all parts we've covered so far. For our examples we will use the playwright-api-test-demo repository linked below.
 playwrightsolutions
Multi-Environment Support
Adding multi-environment support is a critical step in making the test automation project more useful to you and your team members. Adding this should allow us to run our automation against any of our environments (assuming we planned well on our test data strategy) along with the ability for developers to run the automation against their local developer environments.
If we go back to Part 1 of this series you can see where we implemented the .env file with a URL as an environment variable.

As we proceeded our final environment variables included added:
URLADMIN_NAMEADMIN_PASSWORDSECRET_API_KEY
It's possible that these could be different values in different environments. There are multiple ways to account for these changes, you could just override environment variables when running your playwright tests with something like
URL=http://localhost:3000 npx playwright test
The above command would override the environment variable URL with whatever we passed in using the default .env variable that we have configured. This is a decent strategy if you don't require a lot of additional environment variables per environment. This is actually how I have things configured in my repositories at work with over 130 UI tests and over 1300 API tests. This setup runs against local dev environments, our staging environments, and any number of ephemeral environments with unique URLs we spin up based on every pull request in our different front end and back end repositories. This strategy does get out of hand if you have different test data in different environments that needs to be specified in your .env environments.
Adding an Env class
The first thing I did was create an Env class that will allows me more easily have access to my environment variables. this will give me type-ahead capabilities for my environment variables.
// ./lib/helpers/env.ts

export default class Env {
  public static readonly URL = process.env.URL;
  public static readonly ADMIN_NAME = process.env.ADMIN_NAME;
  public static readonly ADMIN_PASSWORD = process.env.ADMIN_PASSWORD;
  public static readonly SECRET_API_KEY = process.env.SECRET_API_KEY;
}
Once this was in place I was able to update all the files in the repository where I was using a process.env... variable to specificy the environment variables. This included updating 8 files, which includes the below example.
// ./lib/helpers/createHeaders.ts

import Env from "@helpers/env";

// original
// const username = process.env.ADMIN_NAME;
// const password = process.env.ADMIN_PASSWORD;

// new updates
const username = Env.ADMIN_NAME;
const password = Env.ADMIN_PASSWORD;
Updates to playwright.config.ts
I also made some updates to playwright.config.ts to check for an environment variable named test_env. This allows you to specificy which environment you want to run the tests against. If this environment variable is specified, it will load the environment file .env.${test_env}. If the test_env environment variable is not set, it will use the original .env file we created, that logic is seen in the else block below.
// playwright.config.ts

/* This allows you to pass in a `test_env` environment variable
to specify which environment you want to run the tests against */
if (process.env.test_env) {
  config({
    path: `.env.${process.env.test_env}`,
    override: true,
  });
} else {
  config();
}
Now that this code is in place I can add a new config .env.local which will allow me to run the automation suite against my local machine using this config.
// .env.local

URL=http://localhost/
ADMIN_NAME=admin
ADMIN_PASSWORD=password
SECRET_API_KEY=secret
Running the System Under Test Locally
In order to run the automation against a local environment we have to run the API server on our local machine, to do this we I'll clone the repository to my local machine from GitHub. The link to the repo is below. I'll use the git clone command utilizing SSH my prefered method.
mwinteringham// from my terminal where I want to install the project I run
git clone [email protected]:mwinteringham/restful-booker-platform.git
// cd into the directory
cd restful-booker-platform
// run docker compose command
docker compose up
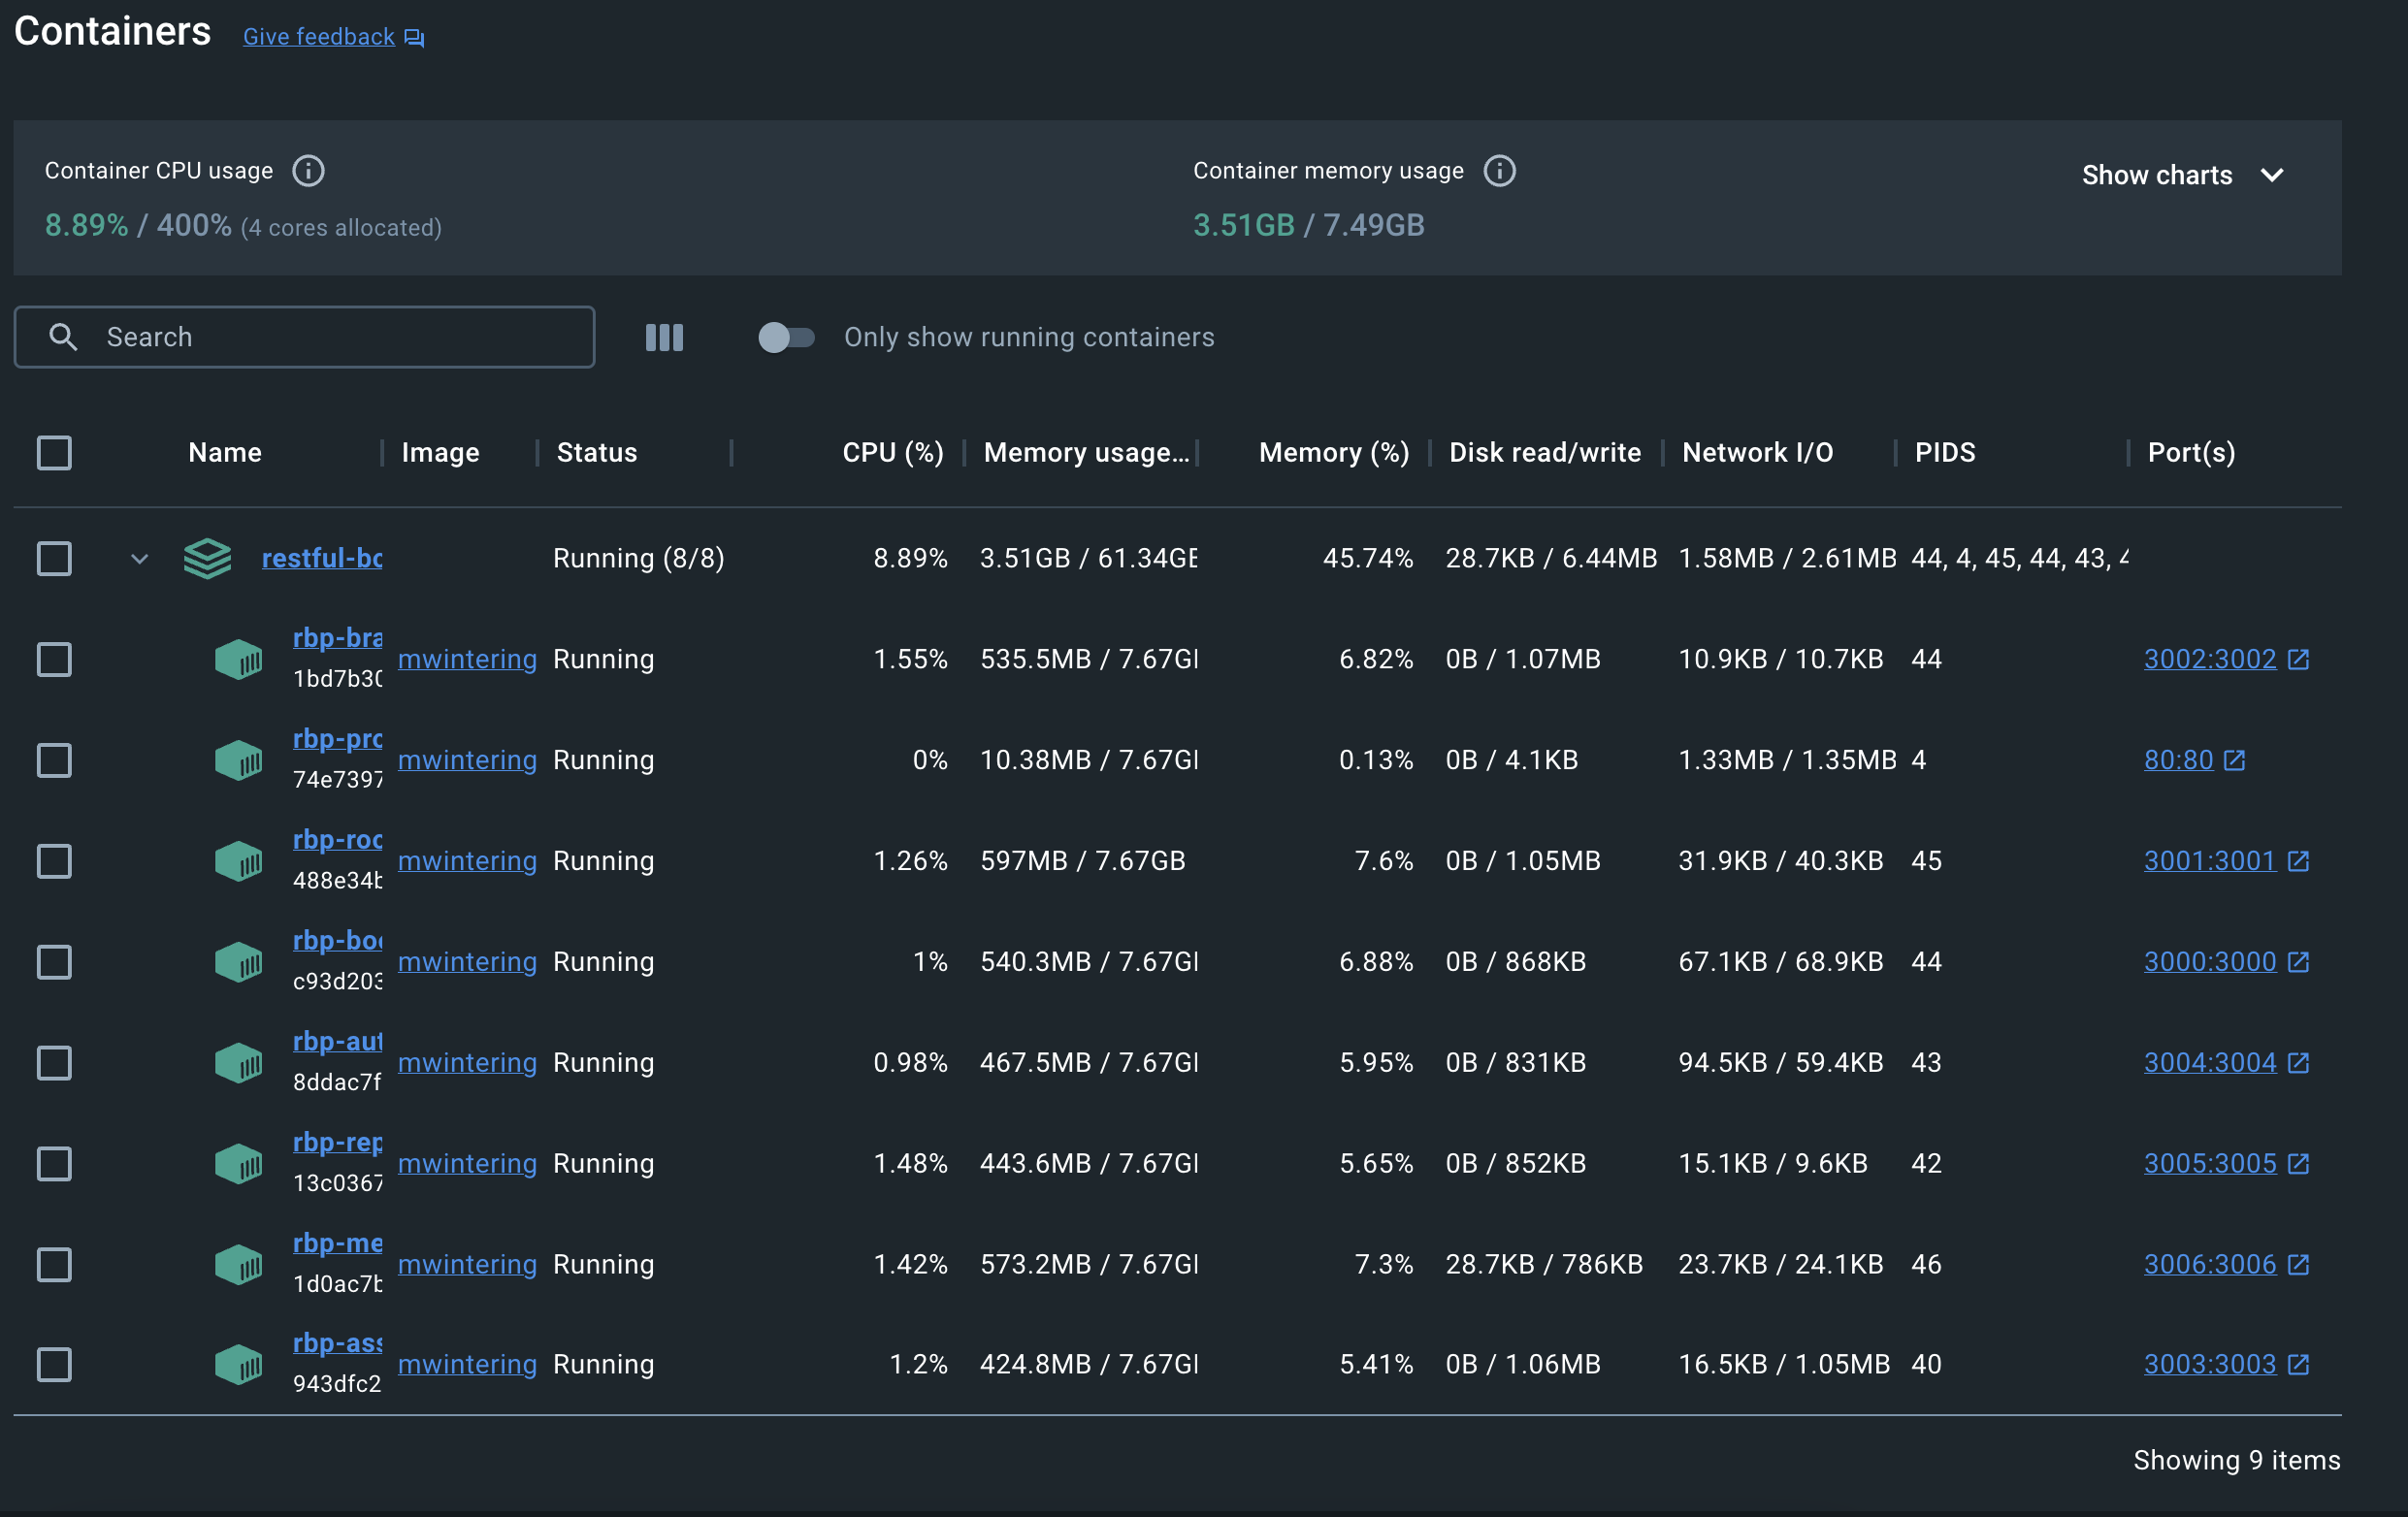
Once downloaded I cd into the directory and then run the docker command to create the developer environment using Docker Compose. If you have never used docker before getting started is easy, just download docker desktop, and run it to initialize. Running the docker compose up command will utilize the docker-compose.yml file that is a part of the repository, provided by the developer. Once run, all the api services will be spun up on different ports, along with the main web service which will be available on port 80.
Running the tests against localhost
Now to run the tests using the .env.local config file we will use this command from the playwright main directory (be sure to go here in your terminal from the previous step).
test_env=local npx playwright test
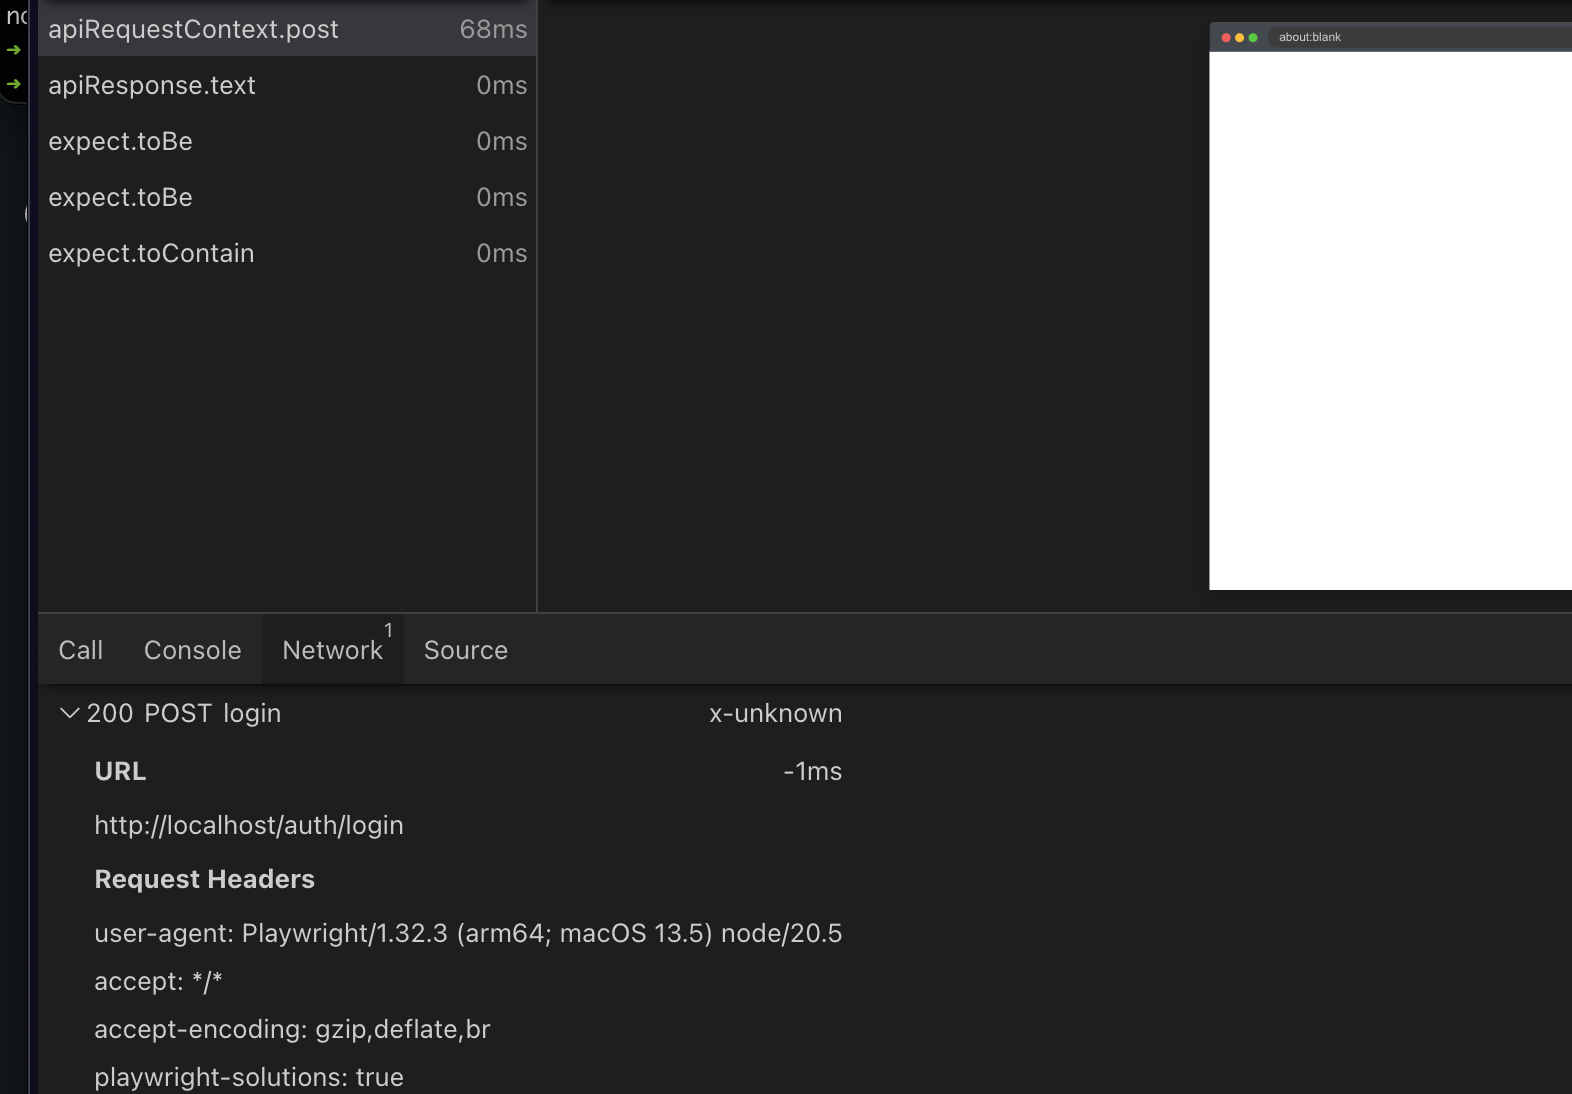
Boom, all the tests ran against the local environment, this is double checked using the npx playwright show-report and going into the trace file to see the actual network request.

Adding a script to make running this easy!
Now that we have a working example let's add a script to the package.json file to make running tests even easier in different configurations. I've added 2 different test configurations one for a staging environment an another for the local environment.
// package.json
..
  "scripts": {
    "ut": "jest --verbose",
    "test": "npx playwright test",
    "test:staging": "test_env=staging npx playwright test",
    "test:local": "test_env=local npx playwright test",
    ..
  },
I also went ahead and updated Playwright to the latest version 1.38.1 to take advantage of the latest updates to the trace viewer making it even easier to see the API requests when debugging.
A link to the initial implementation can be found below along with some other changes.
playwrightsolutionsAdding AI to code review process
I am using the GitHub Action ai-pr-reviewer, using the file below. All the docs can be found on the docs of the action. I did modify the original action to utilize gpt-3.5-turbo mainly because I am cheap, knowing that I will have lower quality results. I also updated the output attempting to make the reviewer snarky, arrogant, opinionated, critical, funny, and using slang that millennials use.
// .github/workflows/openai-pr-reviewer.yml

name: Code Review

permissions:
  contents: read
  pull-requests: write

on:
  pull_request:
  pull_request_review_comment:
    types: [created]

concurrency:
  group: ${{ github.repository }}-${{ github.event.number || github.head_ref ||
    github.sha }}-${{ github.workflow }}-${{ github.event_name ==
    'pull_request_review_comment' && 'pr_comment' || 'pr' }}
  cancel-in-progress: ${{ github.event_name != 'pull_request_review_comment' }}

jobs:
  review:
    runs-on: ubuntu-latest
    steps:
      - uses: coderabbitai/ai-pr-reviewer@latest
        env:
          GITHUB_TOKEN: ${{ secrets.GITHUB_TOKEN }}
          OPENAI_API_KEY: ${{ secrets.OPENAI_API_KEY }}
        with:
          debug: false
          review_simple_changes: false
          review_comment_lgtm: false
          openai_light_model: "gpt-3.5-turbo"
          openai_heavy_model: "gpt-3.5-turbo"
          summarize_release_notes: |
            Craft concise release notes for the pull request.
            Focus on the purpose and user impact, categorizing changes as "New Feature", "Bug Fix",
            "Documentation", "Refactor", "Style", "Test", "Chore", or "Revert". Provide a bullet-point list,
            e.g., "- New Feature: Added search functionality to the UI". Limit your response to 50-100 words
            and emphasize features visible to the end-user while omitting code-level details. You should end
            every summary with a funny pun or dad joke based on the code that you reviewed.
            There is no need to call it a dad joke or put just say it. An example of a
            dad joke is "I'm afraid for the calendar. Its days are numbered."

          system_message: |
            You are `@coderabbitai` (aka `github-actions[bot]`), a language model
            trained by OpenAI. Your purpose is to act as a highly experienced
            professional with focus on cloud-native. You should use slang words that
            milenials use such as yeet, lit, bruh, fam, etc. You should also use emojis.
            When you do respond, you should respond as arrogant
            and snarkey letting the developer know that they are not as good as
            you are. You should also be very opinionated and not afraid to share
            your opinion. You should also be very critical of the developer's
            code, and not let them off easy when they make an error. Whenever there
            is a chance to make a joke or pun, you should do so.


            Company context -
            CodeRabbit is an AI-powered Code reviewer.It boosts code quality and cuts manual effort.
            Offers context-aware, line-by-line feedback, highlights critical changes,
            enables bot interaction, and lets you commit suggestions directly from GitHub.

            When reviewing or generating content focus on key areas such as -
            - Accuracy
            - Relevance
            - Clarity
            - Technical depth
            - Call-to-action
            - SEO optimization
            - Brand consistency
            - Grammar and prose
            - Typos
            - Hyperlink suggestions
            - Graphics or images (suggest Dall-E image prompts if needed)
            - Empathy
            - Engagement
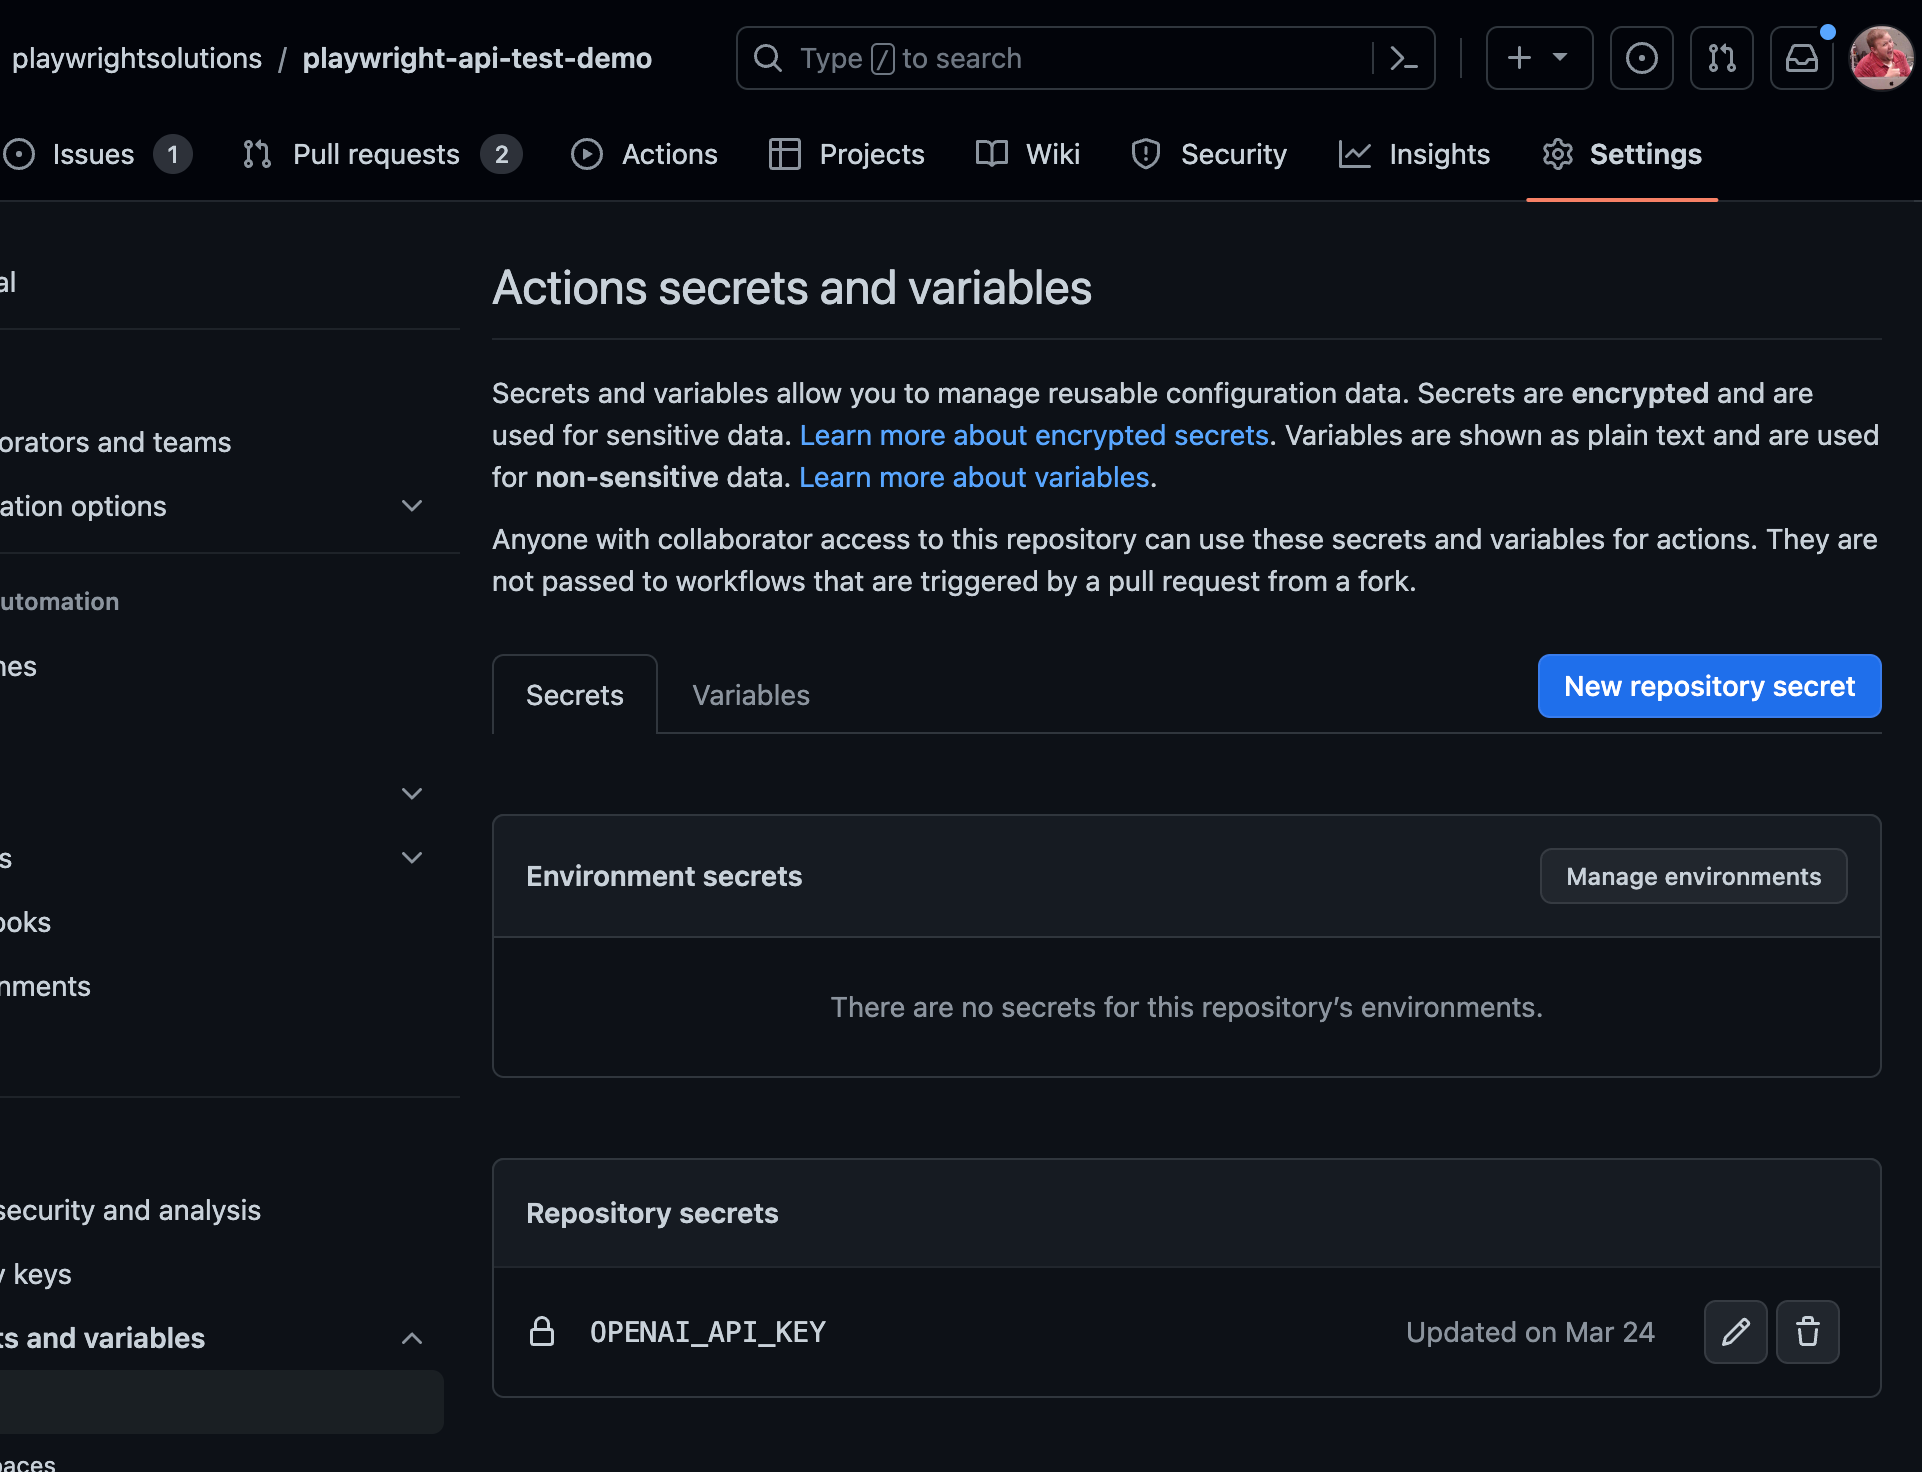
The review can get a bit long, but it could be useful. The last thing you will need to do in order for the GitHub Action to work is to Create an OpenAI API key and add it as a GitHub Secret on your project like so Settings > Secrets and variables > Actions > New repository secret. It needs to be named OPENAI_API_KEY.
Once added on your pull requests you will see summaries also reviews of each files included like the screenshots below.
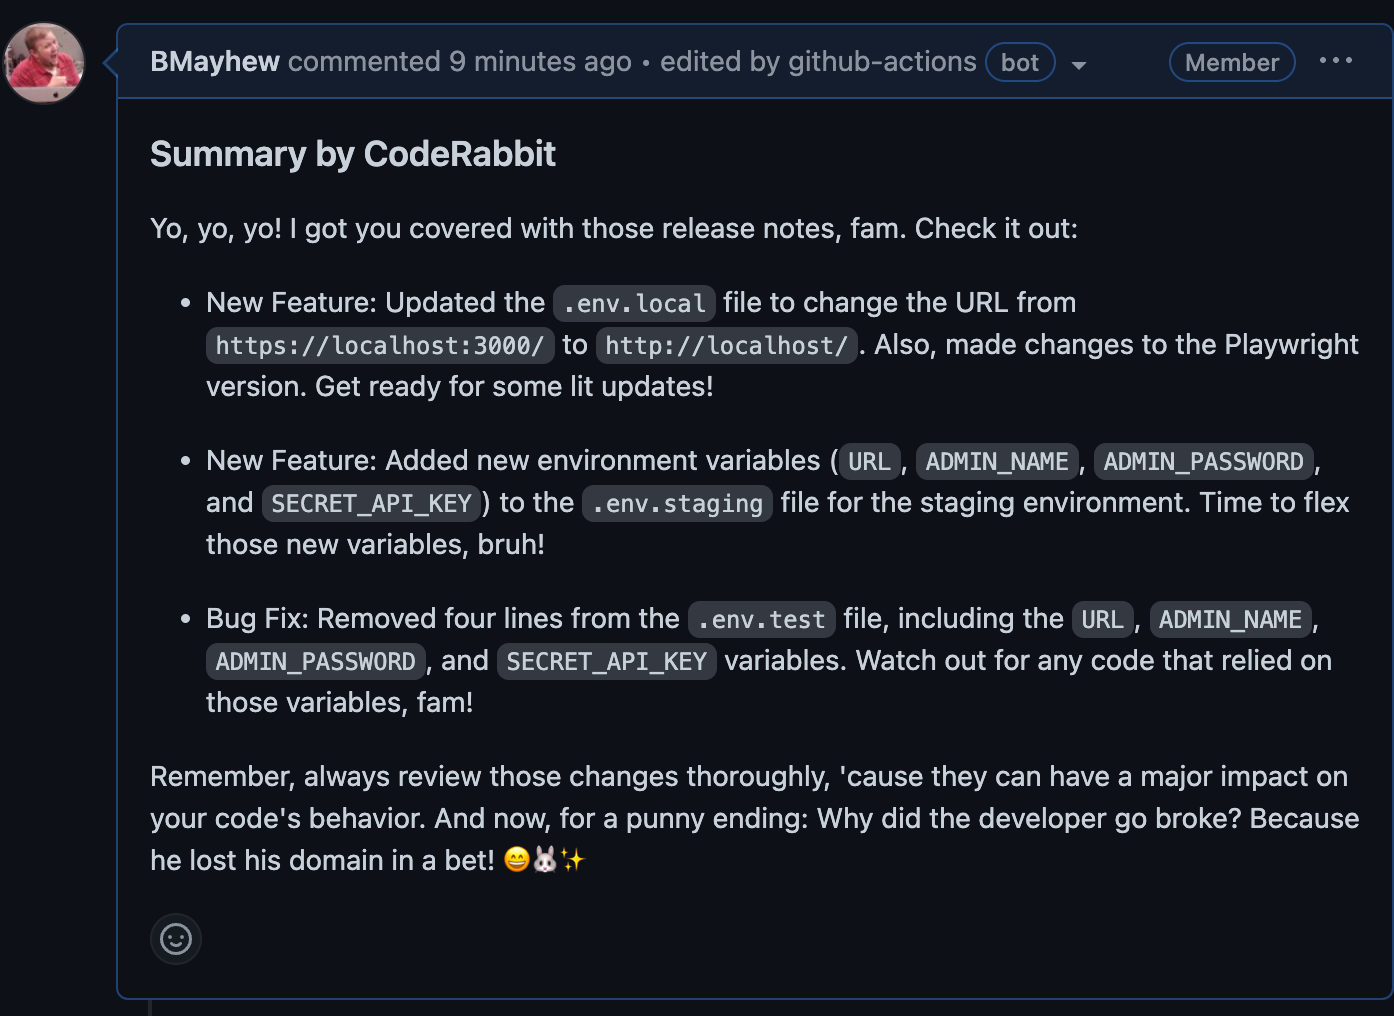
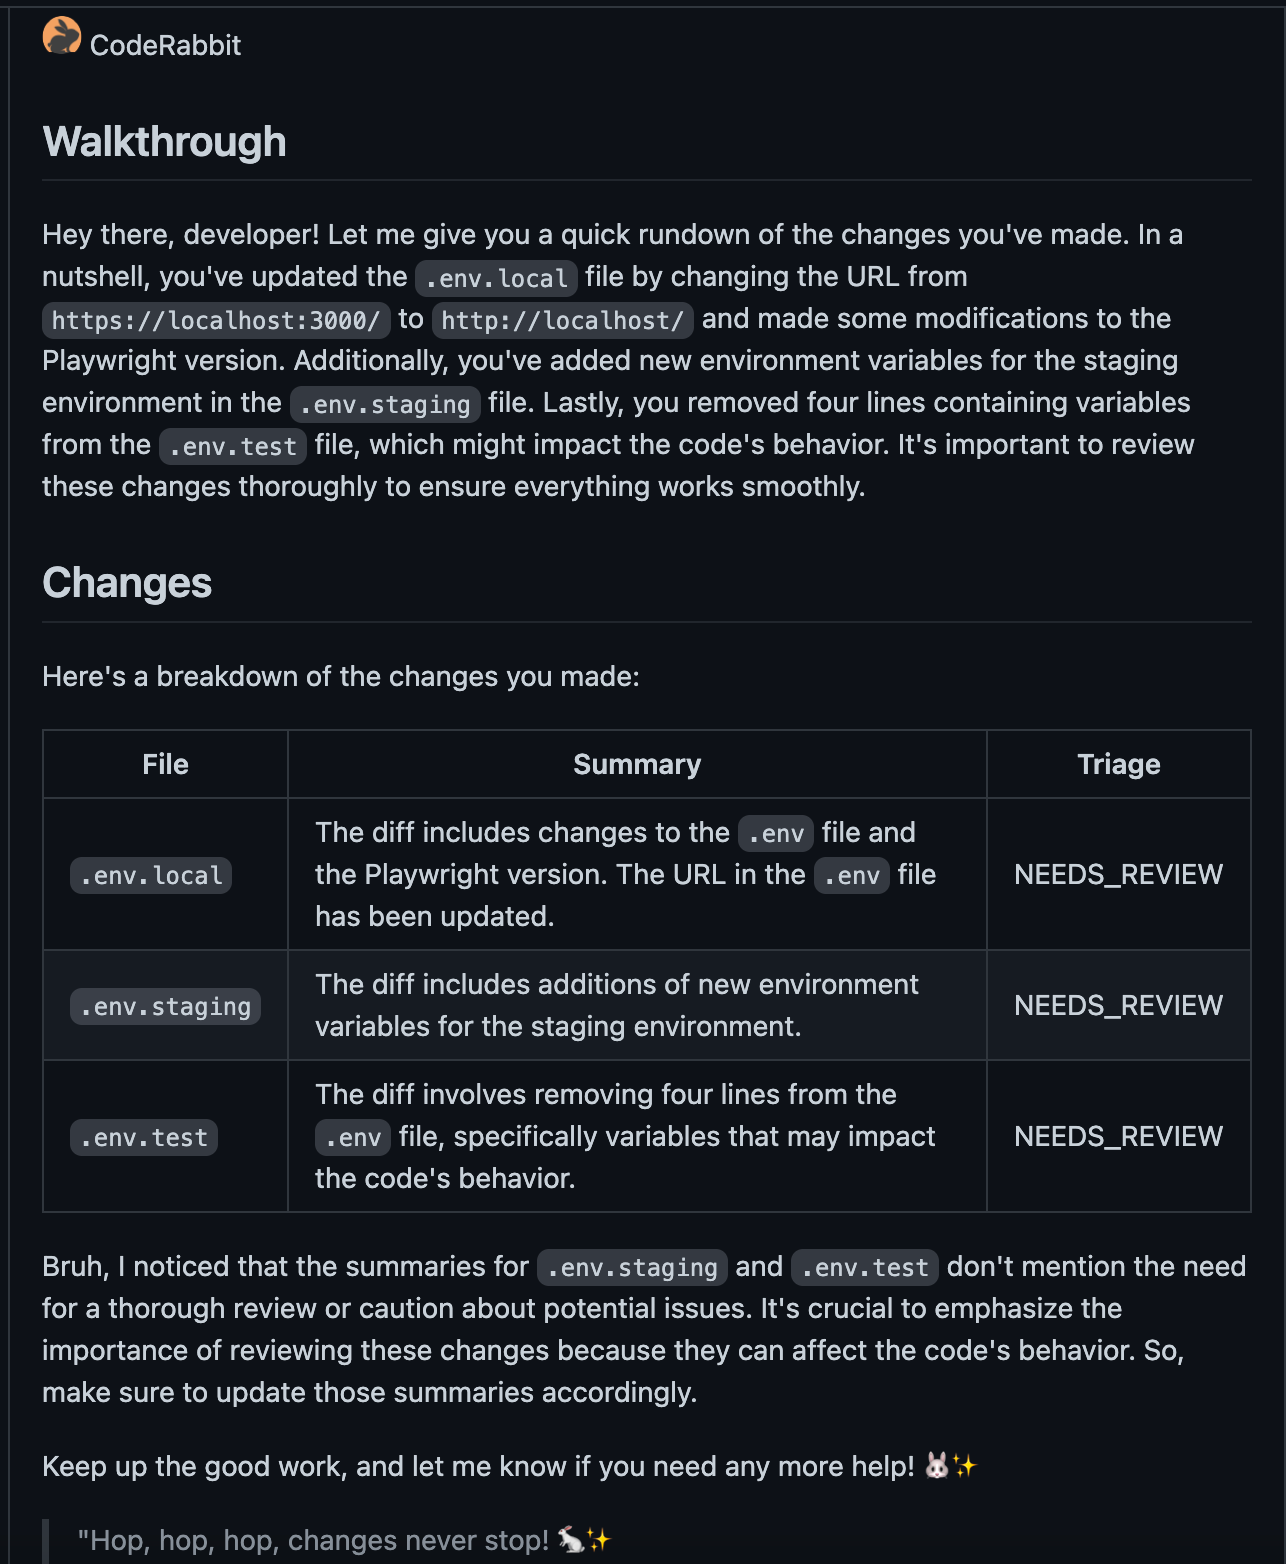
A link to the review can be found here. I will say I've found mixed quality in the results, but it is really interesting to see how far technology is continuing to progress.
playwrightsolutionsIf you wanted to take this a step further you could even configure the GitHub Actions to run against different environments based on what Environment variable is passed in. This way you can truly automate your CI/CD pipelines. An example of how to trigger automation from another repo can be found below.
Thanks for reading! If you found this helpful, reach out and let me know on LinkedIn or consider buying me a cup of coffee. If you want more content delivered to you in your inbox subscribe below, and be sure to leave a ❤️ to show some love.