How do you send the details of a Playwright Test run to a Slack channel via Github Action? - Part 2


A few weeks ago I posted about slack-playwright-report npm package, which allows you to send basic playwright results to a slack channel via a custom reporter within the Playwright test run. Today I'll provide examples of how to send not just the result (pass/fails) but a way to provide more details to your slack channel.
Following this guide is a bit more complex than the above implementation, but it's also more powerful in that this configuration will allow our automation suite to grow and scale through sharding our tests, while still having control over how we report our results.
Generate a summary.json file
In order to get all the details we need, you will first need to make sure have the the playwright-json-summary-reporter installed and available in your project. This npm package will provide a summary.json file that will be placed at the root of your playwright directory. This file is necessary for the next steps as we will be parsing the file. Once installed, everything is done in your playwright codebase! That was easy right?
Create a step in the GitHub action to parse summary.json
In my github-action.yml file directly after my tests run I have a multiline command that is run on the machine that reads the summary.json file. The run command is utilizing jq which is installed by default on the GitHub action ubuntu image, and is useful for easily parsing json from the command line.
This command is setting a variable STATUS to the value from the summary.json file.
STATUS=$(cat ./summary.json | jq -r '.status')
This command sets the GitHub environment variable to STATUS so we can use this in our command when we send a slack message.
echo "STATUS=$STATUS" >> $GITHUB_ENV
We are doing similar things with the Passed, Timeout, and Failures array as well. For each of those arrays, we are using the tr command to replace the \n which indicates a return character to a space ' '. Finally we combine the Failures and Timeouts to the FAILURES environment variable.
# github-action.yml

      - name: Run Playwright tests
        run: APP_URL=${{ env.APP_URL}} npx playwright test

      - name: Read Summary Report to Get Test Results
        if: always()
        run: |
          STATUS=$(cat ./summary.json | jq -r '.status')
          echo "STATUS=$STATUS" >> $GITHUB_ENV
          PASSED=$(cat ./summary.json | jq -r '.passed[]' | tr '\n' ' ')
          echo "PASSED=$PASSED" >> $GITHUB_ENV
          TIMEOUT=$(cat ./summary.json | jq -r '.timedOut[]' | tr '\n' ' ' | sed 's/ /--->TIMEOUT /g')
          FAILURES=$(cat ./summary.json | jq -r '.failed[]' | tr '\n' ' ')
          FAILURES+=$TIMEOUT
          echo "FAILURES=$FAILURES" >> $GITHUB_ENV
So now we have GitHub action environment variables that we can now use in our slack message. Specifically the PASSED and FAILURES include all the test names. At this point we could add a few more commands and get the number of each passed and failures, but we can also just do that in the next step.
Sending the Slack Message
- Create Slack Webhook URL
- Add the url as a GitHub Action Secret with name SLACK_WEBHOOK_URL
- Add the GitHub Action code to your .yml file
We will be utilizing the GitHub action 8398a7/action-slack@v3 for sending our Slack message. There are a ton of different options that exist on the GitHub Actions marketplace, but I've found this one gets the job done, and is customizable enough for my needs. For this you will need a Slack Webhook URL. Follow the below guide on creating a slack app and creating a Webhook URL.

Now that you have the Slack Webhook URL we will want to store this as a GitHub Actions Secret. To do this you will need to navigate to your GitHub Repo and follow these steps.
- Under Repository name click Settings gear
- In the list select "Secrets and variables" and click "Actions"
- Within the Secrets tab click New repository secret.
- Add the name
SLACK_WEBHOOK_URLand the value for your secret should be the full webhook URL from the previous section.
Now that the secret is added, our GitHub runner will have access to that secret when we have the code ${{ secrets.SLACK_WEBHOOK_URL }}. Below is the official guide for reference if you get stuck on any of the steps.

The final step is to write the code for the GitHub action. The code I'm providing below utilizes the custom_payload functionality that is offered through the GitHub action that is being used. You will notice I have a value called ${{ env.APP_URL }} which is an environment variable I save as a part of my test setup not shown. Doing this allows me to quickly know what test environment my automation ran against. There may be a few more things within my notification that are custom and specific to my GitHub actions .yml file, I'd encourage you to take a look and understand what each section contains so you can decide if you need it or not for your project.
# github-action.yml

      - name: Send Slack Notification
        if: always()
        uses: 8398a7/action-slack@v3
        with:
          status: custom
          fields: repo,eventName,workflow,job,took
          custom_payload: |
            {
              attachments: [{
                color: '${{ job.status }}' === 'success' ? 'good' : 'danger',
                title: `Playwright Demo Automation Results :test_tube:`,
                fields: [{
                  title: 'Site Under Test',
                  value: '${{ env.APP_URL }}',
                  short: true
                },
                {
                  title: 'Triggered By',
                  value: [{'origin': 'pull_request', 'new': 'Pull Request'}, {'origin': 'schedule', 'new': 'Schedule'}, {'origin': 'repository_dispatch', 'new': 'Deploy'}, {'origin': 'workflow_dispatch', 'new': 'GitHub Actions'}].find(item => item.origin === `${process.env.AS_EVENT_NAME}`).new || `${process.env.AS_EVENT_NAME}`,
                  short: true
                },
                {
                  title: 'Repo',
                  value: `${process.env.AS_REPO}`,
                  short: true
                },
                {
                  title: 'Execution Time',
                  value: `${process.env.AS_TOOK}`,
                  short: true
                },
                {
                  title: 'Workflow',
                  value: `${process.env.AS_WORKFLOW}`,
                  short: true
                },
                {
                  title: 'Total Tests',
                  value: (`${{ env.FAILURES }}`.match(/.spec.ts/g) || []).length + (`${{ env.PASSED }}`.match(/.spec.ts/g) || []).length,
                  short: true
                },
                {
                  title: 'Pull Request',
                  value: `${{ env.PULL_REQUEST_URL }}`,
                  short: false
                },
                {
                  title: 'Failures',
                  value: `${{ env.FAILURES }}` === '' ? 'No failures' : `${{ env.FAILURES }}`.match(/.spec.ts/g).length > 10 ? `Too many failures to print. Please go to GitHub to see full list of failures` : '```${{ env.FAILURES }}```'.replace(/ /g, '\n'),
                  short: false
                }]
              }]
            }
        env:
          SLACK_WEBHOOK_URL: ${{ secrets.SLACK_WEBHOOK_URL }} # required
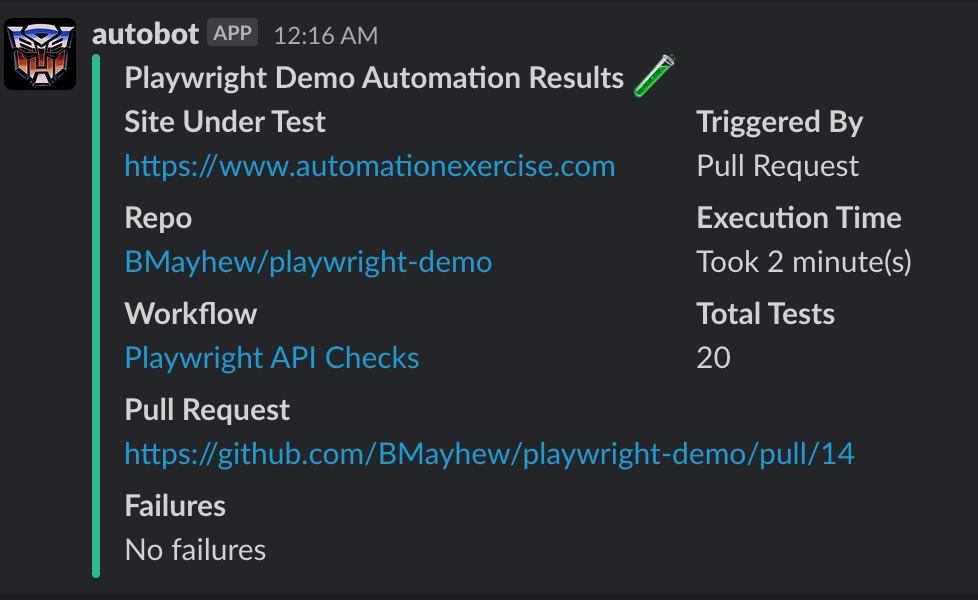
The final outcome should look something like this within slack for a success.
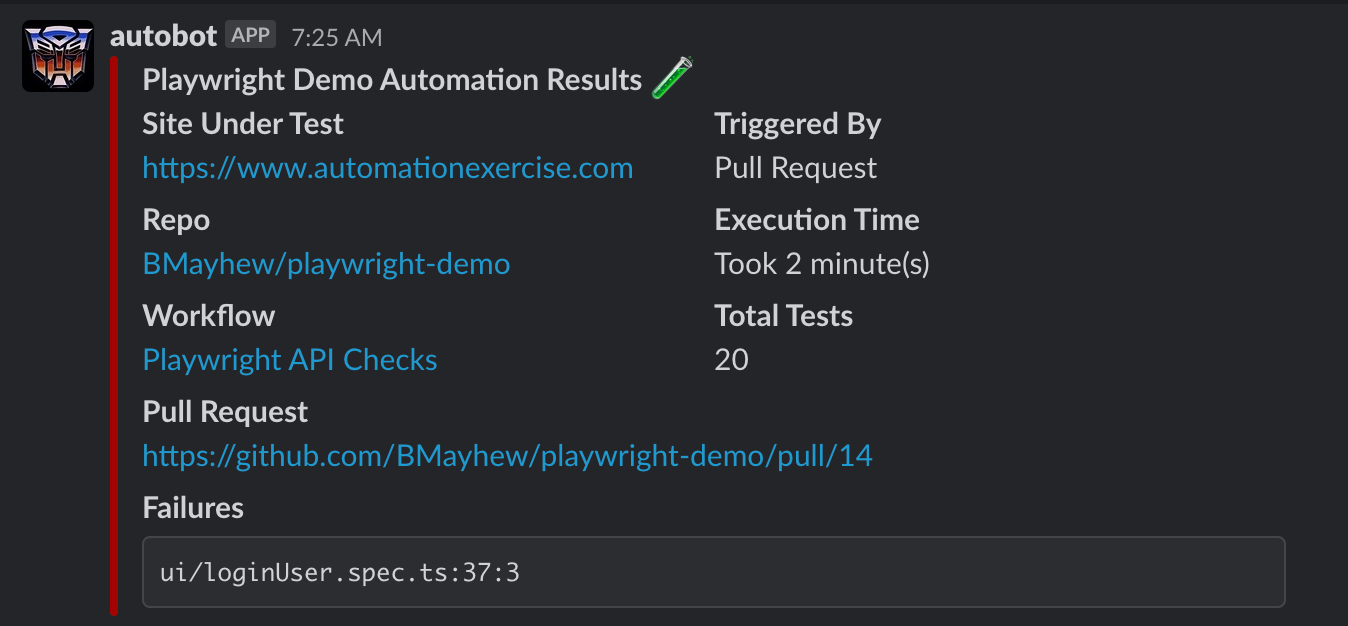
The test failures will look like this 😎.
In a future article I'll walk through the process of how to shard your tests and combine the results of the tests so there is 1 test report and 1 slack message sent after a sharded run.
Thanks for reading! If you found this helpful, reach out and let me know on LinkedIn or consider buying me a cup of coffee. If you want more content delivered to you in your inbox subscribe below.